
The best way to clad a campervan
How to clad a campervan
When it comes to covering your campervan walls, you have a few options: ply lining, carpet lining, or cladding your campervan. Although there is a slight price difference between the three, it is pretty marginal (and remember, in order to carpet line your van you will need to ply line it first to cover the insulation, so in this case the cost is pretty close).
We were keen to have a clean, Scandi vibe in our campervan with white painted cladding on the walls and exposed wooden cladding on the ceiling, so we were happy to spend a bit more time and money on cladding. Below we’ll go into detail on how to clad a campervan.
Products, tools & consumables needed
Products
- Timber tongue & groove cladding
- Automotive carpet & spray adhesive
- Wooden battens – 12mm & 25mm
Tools
Consumables
Weight saving techniques
Before we go into how to clad a campervan, we just wanted to share a method we used to save weight whilst cladding. As most of you probably know, we have a big, silly Belfast sink that weighs quite a lot. To justify this, we have had to make sure to use a lot of weight saving techniques in other areas of our van.
Most people will clad their campervan as soon as they have finished insulating, and they will clad the entire van. Although this perhaps makes cladding easier (and you get lots of nice photos of a big empty van that is fully clad!), it is a lot of extra weight, and money! We made the choice to not clad any areas of our van that wouldn’t be visible, so for example behind our kitchen units, our overhead storage, and under our bed. This saves quite a lot of material, which will reduce weight and also cost.
Building a wooden substructure
Before starting to clad our van, there was some preparation to do. We bought some very thin, flexible wooden battens which we attached in regular intervals to the sides of the van. These were screwed into the metal pillars of the van (so it’s important to note where these are before covering your whole van in silver foil bubble insulation!). These are what the cladding will be attached to, so its important to space them at fairly regular intervals down your van.
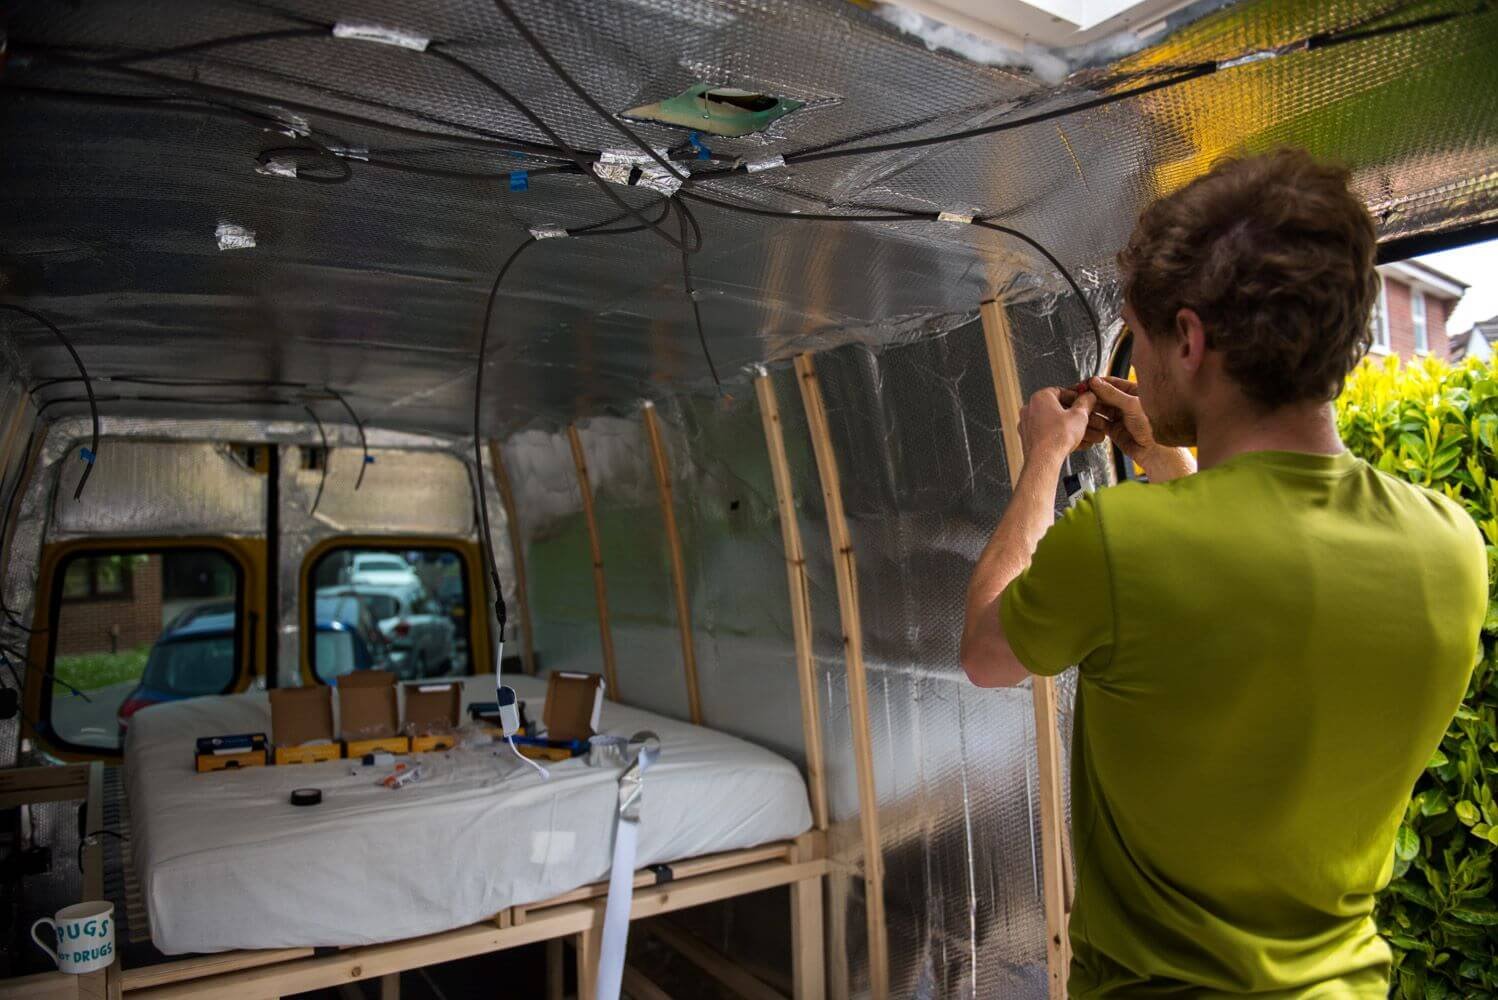
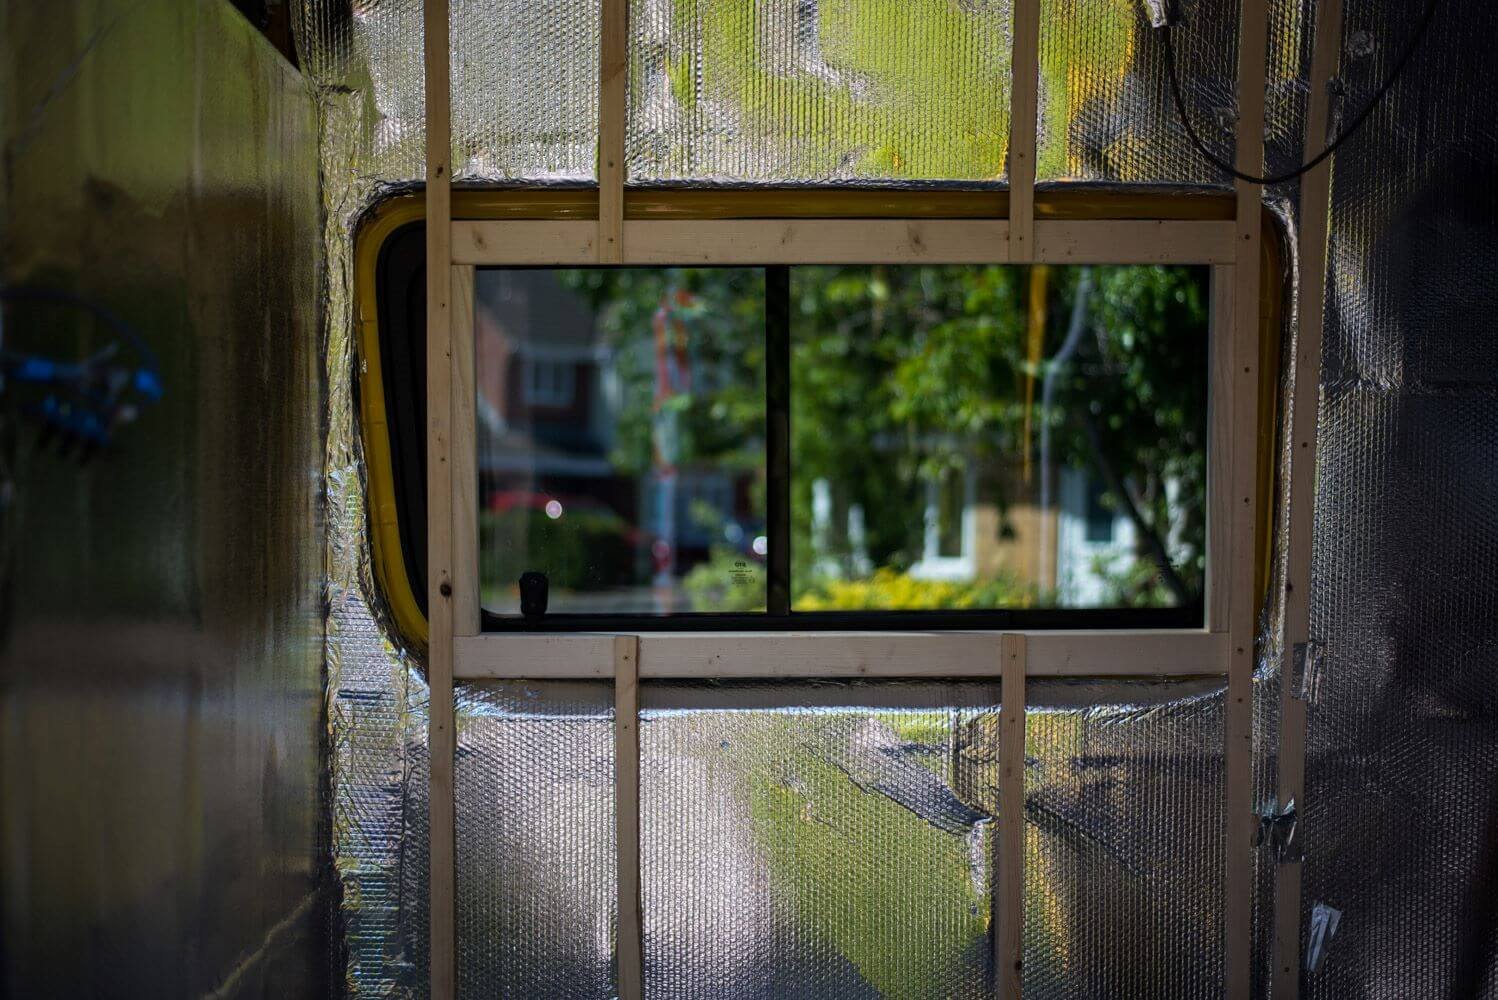
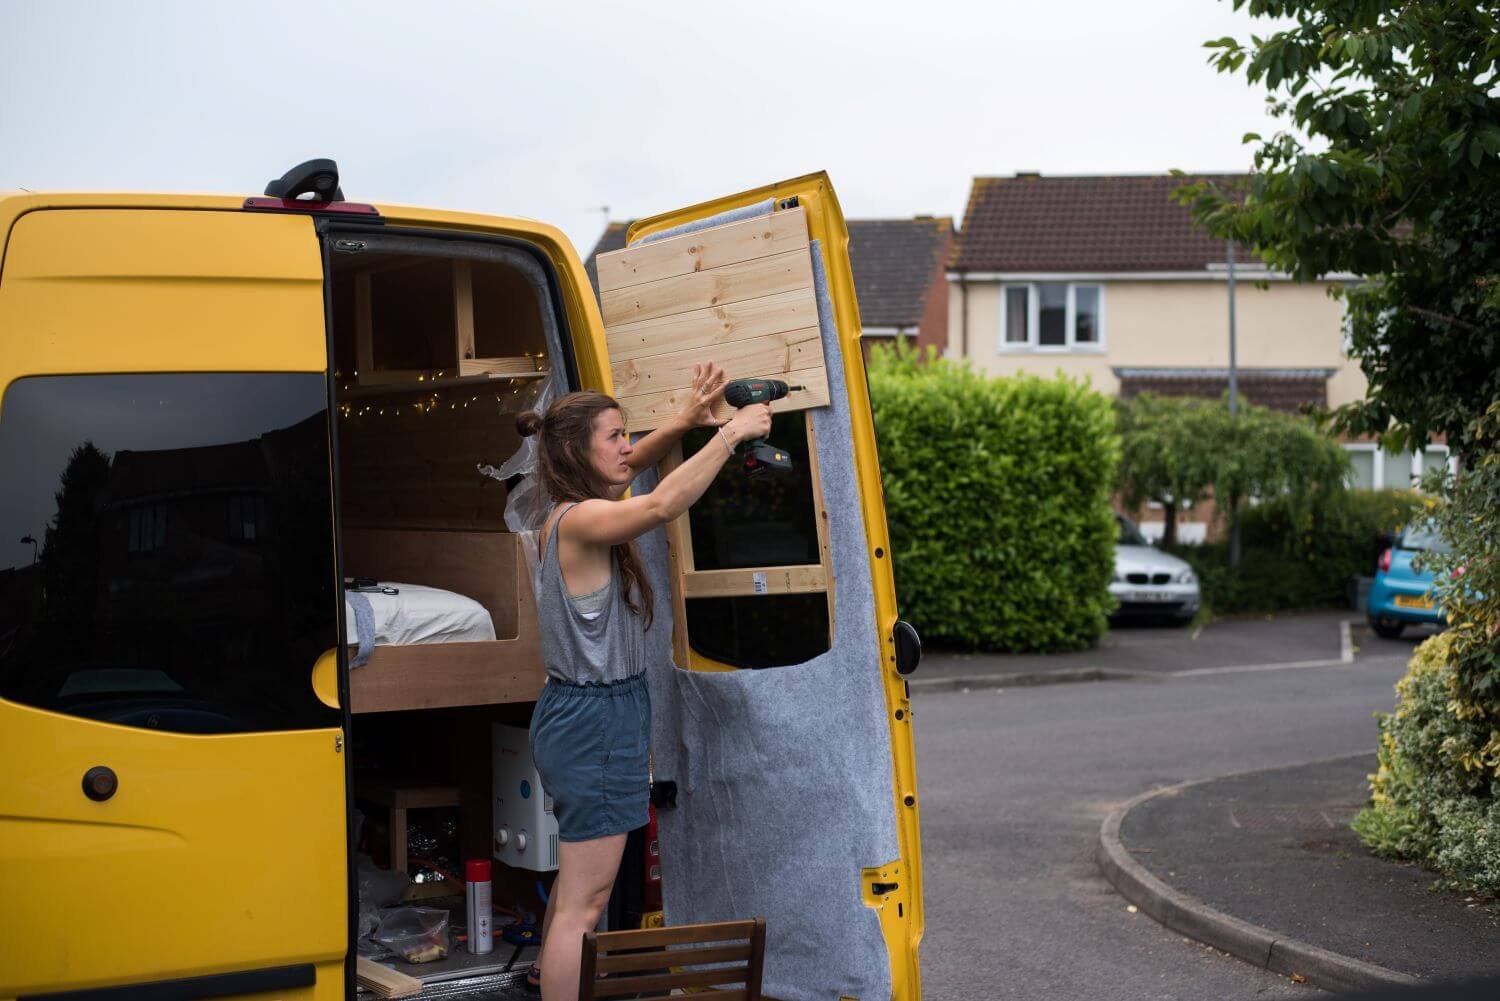
We also made some wooden window frames out of much thicker battens, as this would allow us to frame the windows, rather than having to carpet the edges of them. We did actually end up carpeting the edges of the window on the sliding door and not building a frame for this one, as we wanted to let more light in, so you can approach this in either way depending on the kind of finish you want around your windows.
If you do want to create a frame for some of your campervan windows, you will just need to make a large rectangle out of battens. These are then actually mounted by screwing into the thin battens which you will need to overlap with the window slightly, rather than screwing into the van itself (this is because 1) the metal around the windows isn’t flat which makes it hard to screw into and 2) it’s much thinner, so you don’t want to end up coming out the outside of the van with a screw!
Autocarpeting awkward areas
Once you have finished your wooden substructure, you will just need a method of covering any awkward areas you won’t be able to clad. We have seen a few people do this using hessian twine, but we decided to use automotive carpet. If using this method, you will need to carpet any awkward areas before you start cladding.
The areas you will need to cover with carpet are mainly doorways, where your cladding will finish before the very edges. You will only need to carpet the area that will be visible, so our method was to tuck the cladding into the door seals ever so slightly, and carry it on until where we knew the cladding would cover it, attaching it with spray glue. You need to be careful not to put too much carpet into the seals, as if you do they will bulge and won’t seal properly when you shut the door, causing leaks (speaking from experience!).
We also carpeted the back doors beneath the cladding, as we were worried that we would be able to see some yellow metal from inside the van, however realistically we didn’t need to do this as none of the carpet is visible from inside the van!
If you think you might be able to see some metal of your doors from within the van once you’ve finished cladding, then you can carpet the doors, but there are some quite simple tricks you can do such as using a piece of vertical cladding on the back doors once you’ve finished that will avoid this and can save quite a lot of faff!
How to clad campervan walls & ceiling
It’s worth noting that cladding is quite hard to do without 2 people, especially once you get to cladding the ceiling! We would recommend that if you’re converting a van by yourself, you find a friend who owes you a favour to hold some cladding up for you!
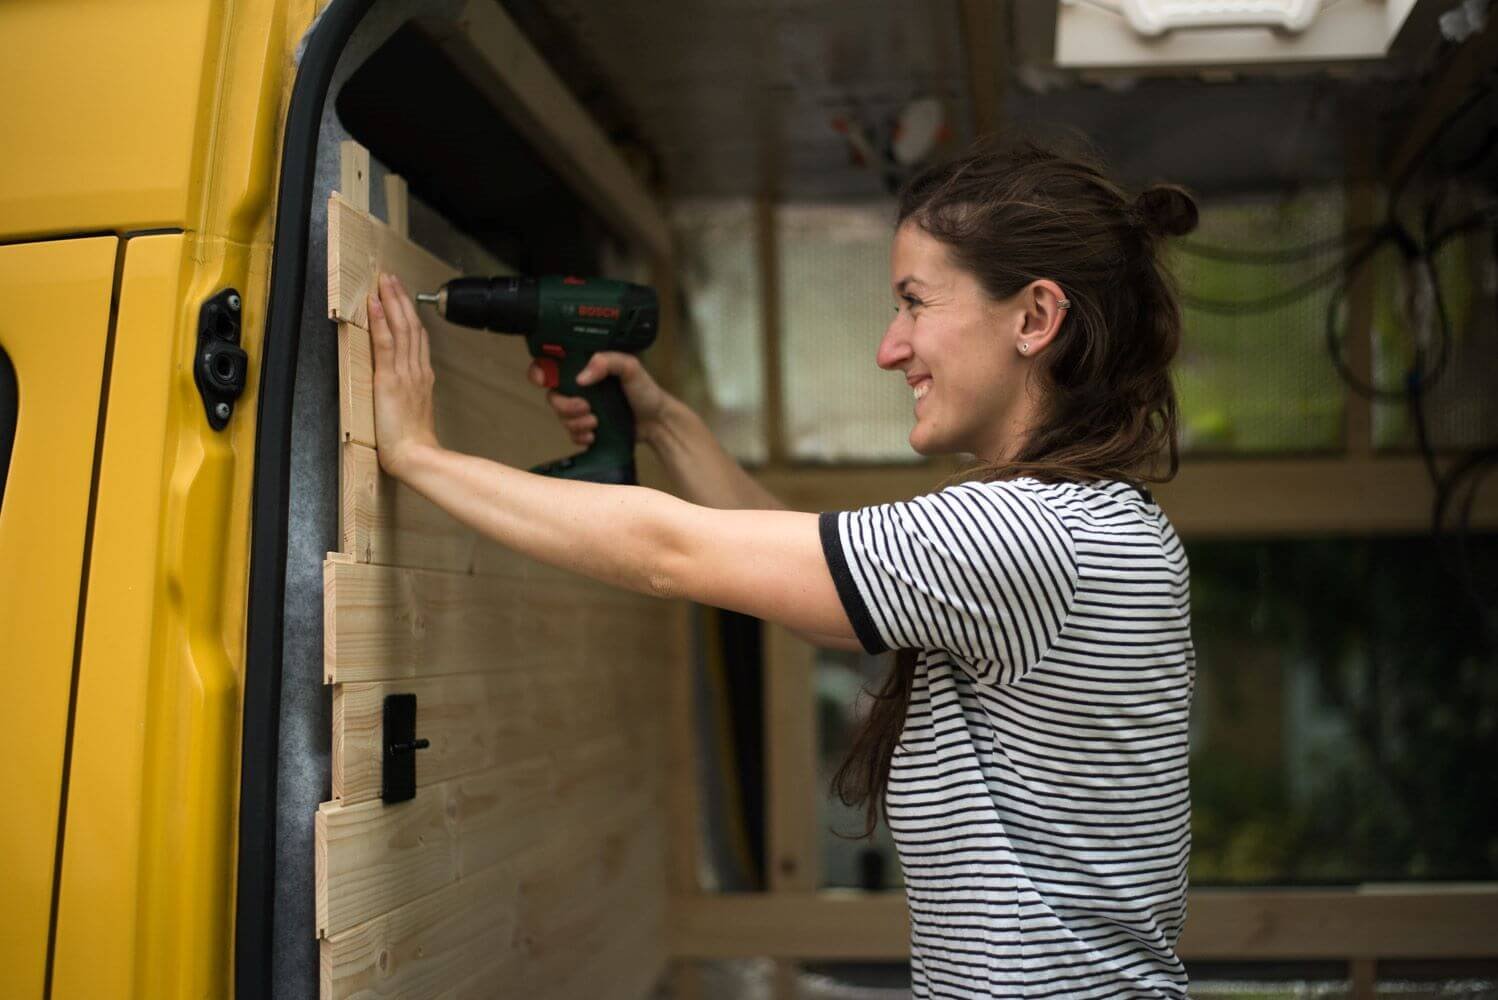
We made our lives harder with the cladding because we didn’t want to have any visible joins or screws in our cladding. Because of this, we ordered 4.3m long pieces of cladding, so there would be no visible joins in the van. As we were painting the walls white, we screwed into the battens on the side of the van, as we could then cover these screw holes with filler and paint over them.
Because we were leaving the ceiling as exposed wood, we opted to use cladding clips. These are very hard to use over a long length and meant we probably spent about 4 times longer than we should have cladding the campervan ceiling. Now we have a lovely ceiling that has absolutely no visible screws, so if this is the aesthetic you want to achieve you can give them a go, but ultimately I’m not sure we would recommend them because of the intense faff involved with using them!
They are also just incredibly fiddly – we got such an intense shoulder work out when attaching the cladding to the campervan ceiling! They also typically require you to start on one side of the van, which isn’t ideal if you want to centre your cladding (i.e. because of vents and skylights which are central in the van). So we started in the middle, despite the fact you should start on one side…and every so often had to deal with a 4.3m strip of cladding falling out of the ceiling. All in all, not a pleasant experience!
Cut and profile your cladding
We started by cutting our cladding to roughly the right length and attaching it to the walls, starting at the bottom (or the bottom of where you are cladding to, which in our case was just below where our kitchen would start). Once you’ve loosely attached it, it makes it super easy to draw on the profile of doors so that you can remove it and then jigsaw it to the right shape and size.
Once you reach a light switch or plug socket, we just held the cladding in place and marked on where we would need to cut out a slot to make it fit.
Attaching cladding in place
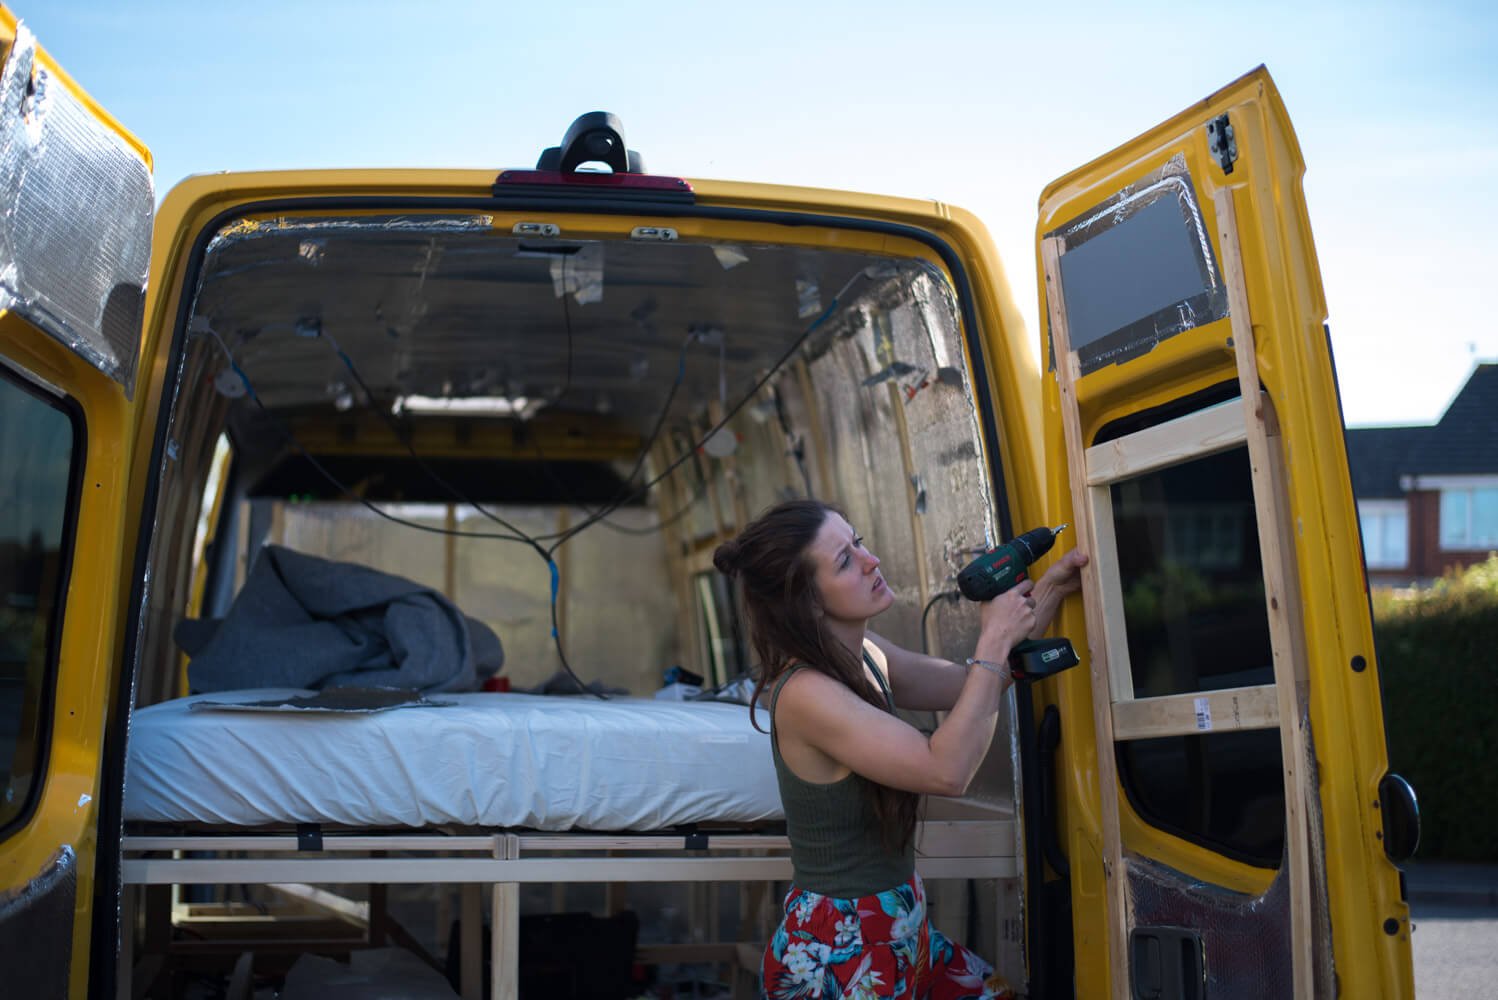
Attaching the cladding to the doors is done in much the same way as the walls – just screw each piece into a thin batten, and make sure you’ll still have enough room to shut the door. We were slightly concerned that we wouldn’t have enough room to clad the side sliding door, but it shuts just fine once cladded.
Once you have clad the side walls, next comes the ceiling. As we mentioned previously, we used cladding clips to do this which so there wouldn’t be any visible screws, however these were a huge faff and I’m not sure we would recommend doing the same!
Whether you decide to use cladding clips or just screw straight into the thin battens, starting from one side, work your way across the van. If you do decide to use cladding clips, these are screwed into the battens once each piece of cladding is in the ceiling. If you will have an overhead storage unit it’s best to start from this side. We actually started from the middle of the van, as we wanted to make sure our cladding lined up with the middle of the van, however if you don’t have something you need to line up centrally we would definitely recommend starting on one side to make your lives a lot easier!
Cutting holes in cladding for lights & skylights
You will need to cut holes in your cladding for your lights, and any vents and skylights if you have them. As both our spotlights and our vents were circular, we used a hole saw set to cut the holes in the cladding for these. We did this before attaching the cladding, but once you’ve cut the cladding you need to be extremely delicate with it as the wood on either edge of the hole can get very thin and it would be very easy to snap it.
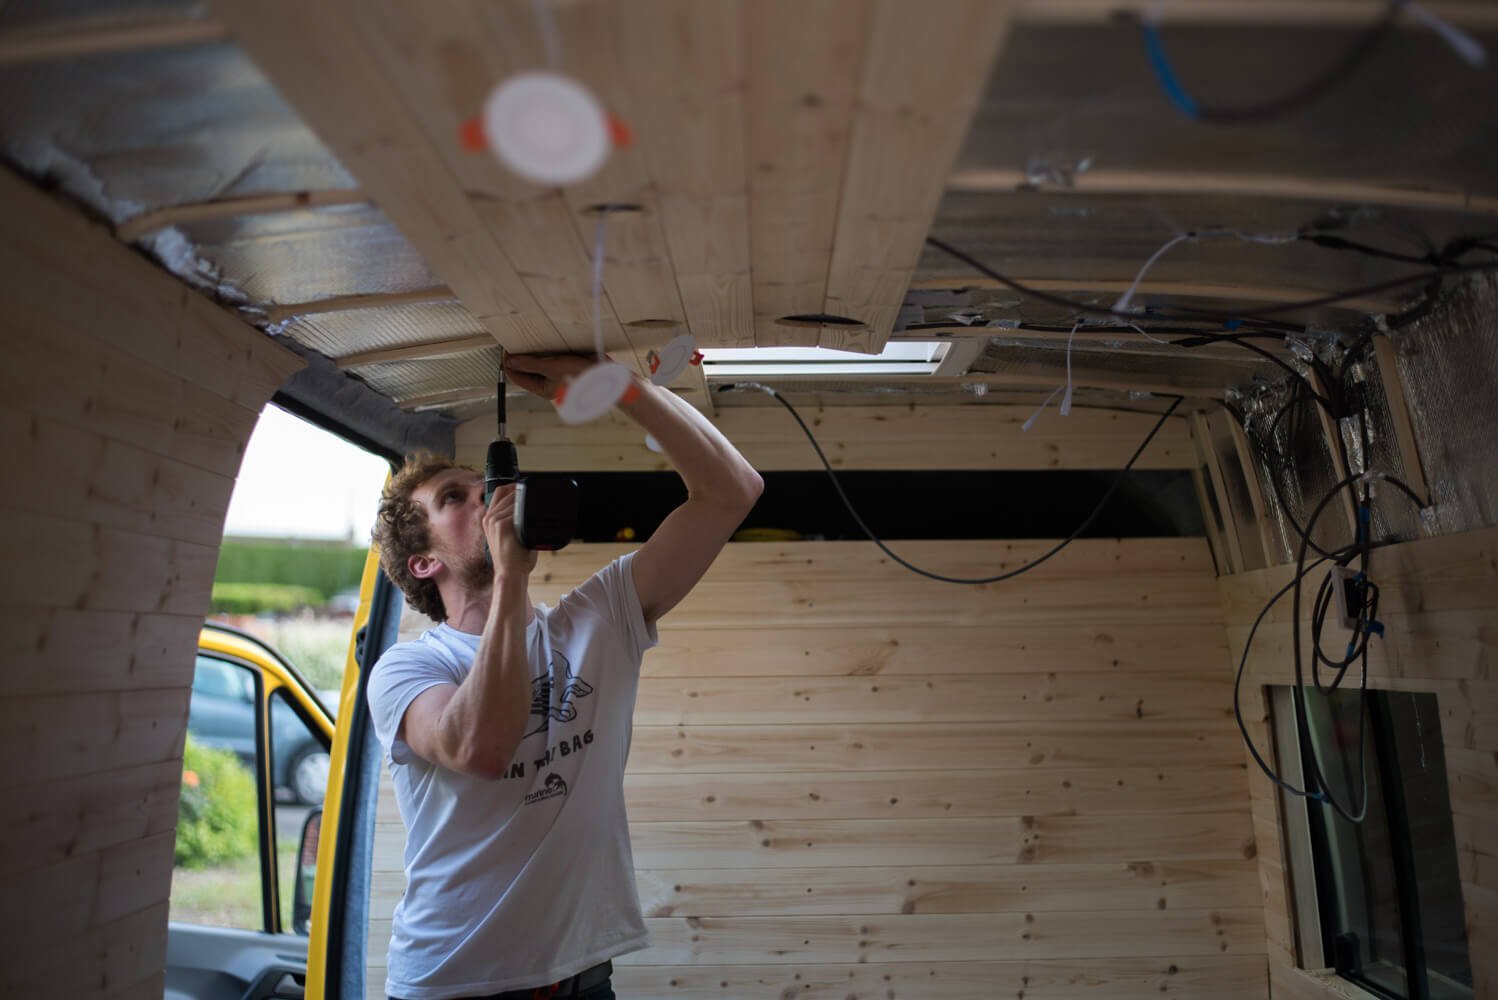
We attached our final piece of ceiling cladding which met the wall cladding by putting a few tactical screws up into the groove of the cladding, so these wouldn’t be visible. The final piece of ceiling cladding will slightly overlap with the final piece of wall cladding.
Once you’re finished cladding your campervan, you can either leave your cladding exposed for a cosy log cabin vibe, or use some filler to fill the screw holes and paint it. We went for a combination of white walls and wooden ceilings, and we love it. Hopefully you now know how to clad a campervan!
How to convert a campervan
Want to know exactly how to convert a campervan? Our 331 page bestselling book, The Van Conversion Bible, covers all aspect of a van conversion, from planning your layout to a step-by-step build guide.

How much carpet did you use for the doors / edges of the van? Trying to figure out how much we will need to just do the edges!
Hi Hazel, we ordered 2x 5m but we had quite a lot left over and also used loads on the doors where we didn’t really need to, so you’d probably be fine with 5m!
Hey guys, please can you send me any links or photos of the hessian twine idea that you mentioned you’ve seen some people use?
I’m looking for a nice way to finish off some bits of exposed metal in my van… haven’t used carpet anywhere else and there are places where it will be visible…
Many thanks – and great build ☺️ X
Unfortunately it was a long time ago and I’m not sure where we spotted it! If you have a search on Pinterest you should be able to find something 🙂
Am about to clad my van – most USA vanbuild videos say cedar is the best wood but is not easily available here in UK. Am interested to know what wood you used, what was the thickness, where did you purchase from?
Many thanks
Hi Barbara, Cedar is certainly a beautiful timber for cladding and it is really light but as you pointed out it can be hard to find and often expensive! We used a good quality pine from a timber merchant chain called Bradfords. It was 9mm thick and came in 4.8m lengths so we could span the full length of the van. Hope this helps!
Hi guys, was just curious as to just how much cladding you had to buy to complete the van?
Hey, Sorry this is a tricky one for us to answer as we based our cladding on order on the total surface area of the van minus the areas we didn’t need to clad and we can’t find the number I’m afraid. One bit of advice we would give though is to order ~5% more than you think you need because some pieces of cladding had knots that caused the cladding to snap easily!
Hi,
How exactly did you screw the batons to the van? And what depth/width were the batons?
Your van looks beautiful!
X
Thank you! Do you mean the battens the cladding is attached to? They were screwed directly into the metal beams of the van using self driving screws, and they were roughly 20x45mm. Hope that helps!
Hi guys, having lived with the exposed wood ceiling for a bit now, have you experienced any issues with condensation or damp stains? And do you have any recommendations on wood finishing to avoid this? We are considering using danish oil vs varnish.
Thanks in advance! 🙂
Hi Maria, we haven’t had any issues with condensation or damp stains. We’ve used a Danish oil on our ceiling to protect it, but the most important thing you can do is insulate well (including a vapour barrier) and ensure you have adequate ventilation. We have a skylight which we pop open when we cook, and we also have two fans, one to draw air into the van and one to expel air. This ensures constant airflow in the van which minimises the risk of condensation and damp forming. If you can create a sealed vapour barrier when insulating, this will also help to reduce moisture and damp. We’ve included a lot more information on this in our new book, The Van Conversion Bible 🙂 Thanks!
Hi guys- your van looks fab! We are hoping to use a similar cladding/ window frame technique for our rear windows. Can you let us know what thickness of battens you used on the doors? We are worried that 20mm depth is too thick but 12mm ply isn’t strong enough to to support the window frame itself. Thanks- Jill & Chris @melloyellovan
Hey guys, So for the sliding doors we didn’t have enough room to add any battens as the clearance between the side of the van and the sliding door was so minimal. Instead on the sliding door, we insulated the panel, applied the vapour barrier then attached the 9mm cladding straight to the metal wall of the van door. This creates just about enough clearance for the door to open. You should then be able to use thicker battens around the window frame area and attach them to either your cladding or ply covering to create a frame and window cill. Hopefully that’s useful, it’s tricky without being able to see pictures so you could always send us a picture on Instagram if you need further help 🙂
Hello, Lovely van! thanks for creating the blog. In question to the cladding on the door – how did you attach it without battons? the doors on our van are pretty thin and im worried about screwing into them/through them.
Hey Megan,
We used battens on all the walls, ceilings and rear doors but the sliding door we had to screw the ply directly into the inner metal skin of the van because the clearance between the door and side of the van was so small. We used self-driving screws to attach the 9mm ply directly to the metal but only in the areas where we wouldn’t screw through the outer skin of the van. Hope this helps!
Hi again, Thanks for the response on the bulkhead frame! I’m going to buy the wood tomorrow. Now I was wondering how big the cladding is you used for the sides? I know it’s 4.3 long and 9mm thick but how big is each cladding piece like 7-10cm? I also don’t understand how you attached the battens to the van vertically to attach the cladding? I was going to attach the battens horizontally to the bus and attach 3 or 5mm plywood sheets and fix my bed and seats through the plywood on the battens so they are fixed on the sides of the bus. Then I was going to glue the cladding to the plywood. (This way I don’t have to clad the entire bus but just the visible area’s) But after reading this post and watching the pictures I’m beginning to doubt haha
Hey, Our cladding is 100mm x 9mm x 4300mm. It’s important that you position your battens perpendicular to the direction you want your cladding to face (vertical batten for horizontal cladding) this ensures that every piece of cladding will always have several locations to screw into. The vertical battens need to be screwed into the metal ribs of the van/bus (not the outside skin of the van!) ideally you want to place battens every 1000mm to support the weight of the cladding but this is somewhat subject to where the metal ribs are in your bus so you might need more or less than this. Ideally you should attach your vapour barrier first then batten over the top to limit the number of holes in the vapour barrier. Hope this helps!
Hi, where did you get the cladding for the roof from please?
Hi Lee, our cladding was from a timber merchant in Avonmouth called Bradfords. I don’t believe they offer 4.3m lengths anymore. As long as you purchase it from a timber merchant it should be good quality (rather than B&Q etc). Hope that helps!
Love the fab tips on many items we shall be encountering in our recent van build. Citroen Relay L1H1 2.2
Only at the first stage clean ‘ prepare. Glad we found these great tips. ⭐️⭐️⭐️⭐️⭐️
Thanks
Hello! Thank you so much for sharing all your hard earned knowledge with the world! There is so much to research it is really helpful being able to read through well organised information.
I am at the stripping and preparing stage and starting to insulate with wool and boards.
I am looking for info on what to do with the wiring at this stage. Do I thread all of the wiring out of the inner metal frame of the van so I can then secure it in plastic piping? I want to decide later on my electrics/light position and as you recommend, have the electrics behind the cladding. Thanks for any advice and I hope you are having brilliant adventures in your van!
Hey Joni, we’d recommend fully insulating and attaching a vapour barrier, and then running the wires before attaching your cladding. The wires can be attached using P clips or similar, and we’d suggest running them in straight lines down to the floor from any switches/appliances so you know where they are. They will sit in the recess between the insulation and the cladding, created by small battens used to attach the cladding to. Hope that helps!
Hi! I was just wondering how much height you think you lost from the ceiling and flooring? I’m quite tall so trying to plan if I’ll still be able to stand up!
Hi Ellen, we put 40mm of insulation in the floor, and then laid flooring which for us was ~12mm. On the ceiling, the insulation is fitted between the existing beams, so the cladding only adds around 25mm (~10mm for cladding and ~15mm for battens for the cladding to go on to). So in total we maybe lost around 80mm of height, but you could potentially use thinner insulation on the floor if you wanted to reduce this. Hope that helps!
Hi! Just about to finish cladding the walls in our van, and planning to carpet the awkward bits like you.
Did you carpet directly over the moisture barrier? Did this not come out bulky?
Just wondering about the gaps in the body work and not sure about carpeting directly onto the metal as I’ve seen some people do.. many thanks
Hi Lucy, yes we carpeted directly onto vapour barrier and metal of the van, it’s only very small bits of carpet to fill in any gaps not cladded, so we found this worked well and didn’t end up too lumpy etc!
Hey!
Working through the bible at the moment and see referencing tk thermal bridging, and then recommending screwing wall batons onto metal ribs (through the vapour barrier?). Is this just a necessary/tolerable amount of thermal bridging inherent in the process or am I missing a technique here?
Cheers
Adam
Hi Adam,
Thanks for your comment! You’re correct that the screws do create a thermal bridge, but they only represent a very very tiny area which is hard to avoid.
We hope this helps and good luck with your build 🙂