
How to install a campervan water system
Installing a campervan water system can be a daunting task – get it wrong and you’ll be left with leaks and a damp van! The first thing you will need to decide when planning your DIY campervan water system is what aspects you want to include in your system.
Our own campervan water system is comprised of…
Water in via:
- A 70L fresh water tank
Water out via:
- A tap and sink with running water (cold only)
- An instant hot water outdoor shower
We decided to keep our campervan water system relatively simple to minimise complexity. If you want to have hot water coming from your kitchen tap, or if you’re installing an indoor shower in your van, your system will need to include a boiler with a flue that can vent outside. Because our shower is an outdoor shower, this made our system much more simple – the shower is mounted next to the back doors and will only ever be used with the back doors open, so this meant we didn’t need to build in a flue.
What size water tank should you install in your campervan?
When sizing your water tank, you should consider a few different questions:
- What is your general water usage (i.e. do you have a shower, how often will you use it etc)?
- How often will you be able to refill your tank (i.e. how much time are you planning on spending off grid)?
- How much do you want to spend (the bigger the tank, the more expensive)?
- How much space do you have (i.e. where will you mount it)?
- Do you need to consider weight (i.e. do you have a big van that will be close to 3.5T)?
It’s worth trying to calculate how much water you think you will use. People are meant to drink 2 litres of water per day. You will also use water for doing the dishes, washing clothes, washing yourself, and this all adds up. It’s really important when you’re living in a van to be frugal with water and not just use it as you would at home. Below is a table of our estimated weekly water usage for the 2 of us to give you a bit of an idea.
| Task | Usage |
|---|---|
| Drinking & cooking | 21L |
| Washing up | 7L |
| Showering/washing | 15L |
| Washing clothes | 2L |
| TOTAL | 45L |
This works out at around 6.5L per day for 2 of us, which means we only need to fill our 70L tank around once every 1.5 weeks.
Obviously usage will vary massively from person to person – if you have an indoor shower in your van that you use daily, you will likely need a bigger tank, or to fill up every day or 2. If you plan on staying mainly in campsites where you will be able to fill up regularly, it makes sense to have a small tank. However, if you want to be able to go off grid for several days at a time, you’ll need to make sure your tank is big enough for your usage.


Once you have worked out your usage and you know how often you will need to fill up, you can start to work out what size tank you might need. With water tanks, it’s not just a case of buying the biggest thing you can for a couple of reasons. Firstly, water weighs a lot – 1 litre of water = 1kg, which means if you have a 200L tank that’s an extra 200kg you’re carrying around when it’s full! The other reason is that a bigger tank will be more expensive, so it’s best to work out what size you think you will actually need rather than just buying the biggest thing possible.
We installed the 70L Fiamma water tank, however we would not recommend this tank to others. It does not have a lot of the inlets in useful places, and if we were to do it again, we would get a custom tank made which sits over the wheel arch. These are good as they utilise space which is otherwise quite hard to use.
It is also possible to install an underslung water tank on the bottom of your van which will save valuable room inside, but this might not be the best choice if you’re planning on spending time in colder snowy climates where the water could freeze.
Grey water tanks
We also chose not to install a grey water tank. Grey water tanks are used for ‘dirty’ water from the shower and sink, and a lot of people who plan on spending a lot of time on a campsite will have them so as to not drain their water straight onto a pitch.
As we plan on free camping 99% of the time we’re in our van, and our grey water will only be coming from our sink, we didn’t feel the need to install one. We use eco-friendly washing up soaps to make sure we’re not putting any harmful substances into the environment, and we also have a strainer in our sink to ensure no food waste ends up outside.
If you don’t want to install a grey water tank but you plan on spending some time on campsites, you can always leave a container underneath your waste water pipe to collect the grey water and dispose of it before you leave.
If you do want to install a grey water tank because you will be spending a lot of time on campsites or stealth camping in cities, make sure to consider the size that will be right for your requirements – how often you will be able to empty it, and how big a factor cutting weight in your build is will affect your choice. You will also need to consider where to mount it – often people mount this directly under their sink so the waste pipe can go straight into it, and it’s easy to access for emptying.
Our campervan water system diagram
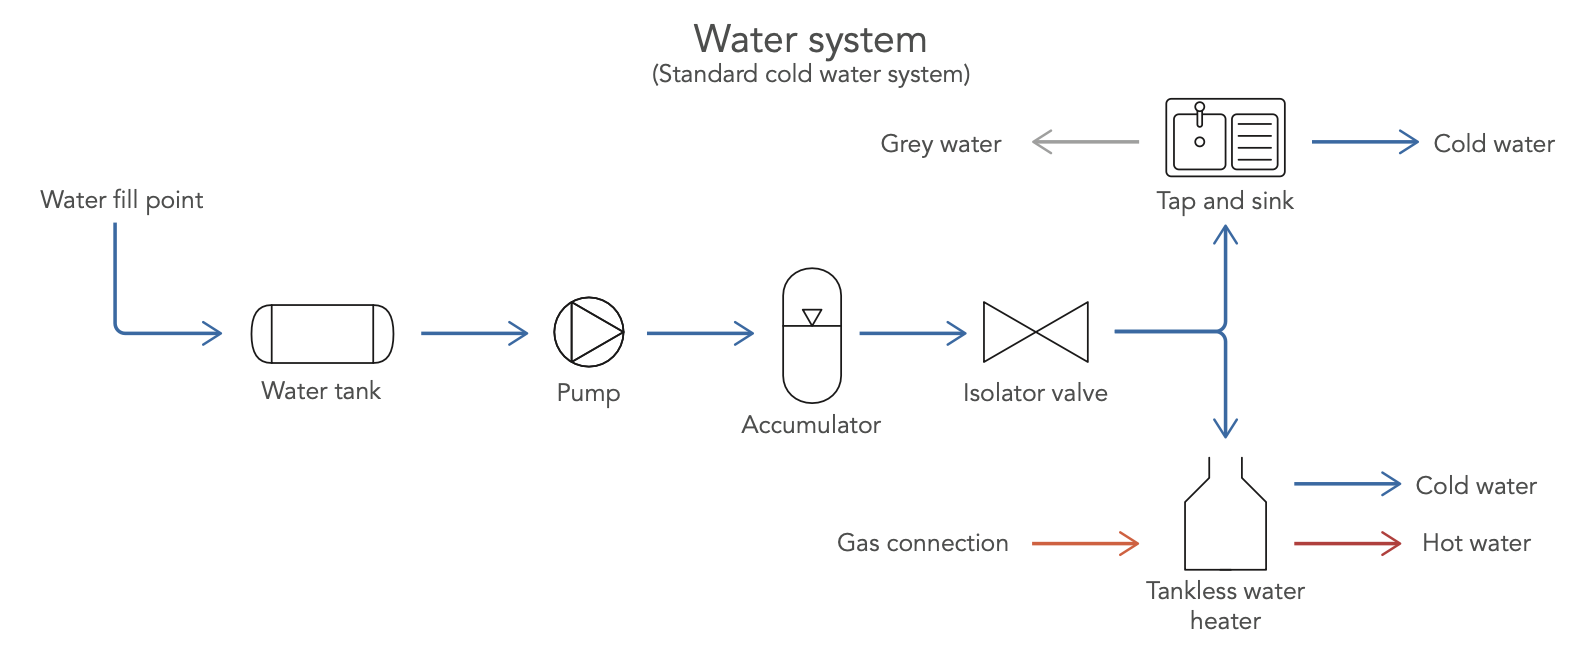
Our system consists of:
- Water coming in via a water inlet point in our boot
- Water going out via our sink and our outdoor shower
We chose not to install a boiler that we would need to vent out via a flue, so we just have cold water going to our tap. Our outdoor shower is an instant water heater connected to our LPG tank.
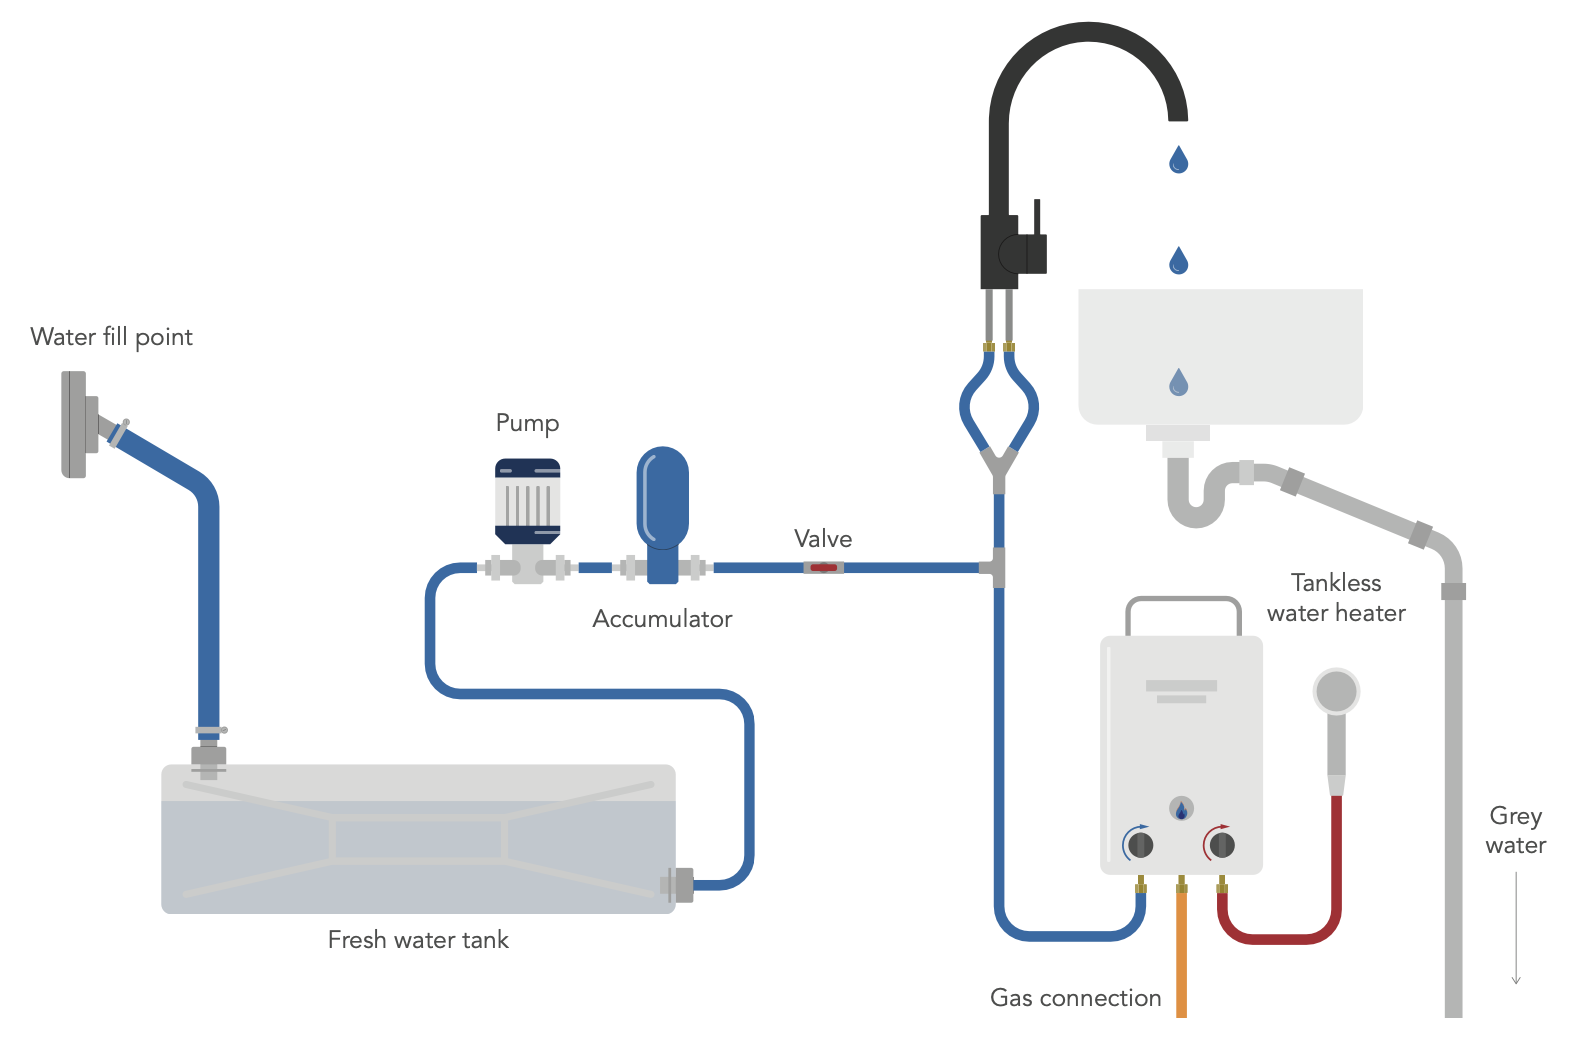
A more visual representation of our campervan water system
What components do you need for your campervan water system?
Before you start plumbing in your campervan water system, you will need to make sure you have all of the right components. Below is a list of all of the components we bought (links are Amazon & eBay affiliate links that will earn us a small commission at no extra cost to you).
Main components
- 70L fresh water tank
- Shurflo 12V water pump
- Fiamma accumulator
- Mixer tap
- Belfast sink
- Instant hot water outdoor shower
Electrical components
Hose, connectors & accessories
- 10m x 12mm semi flexible water hose
- Convoluted waste water hose
- 3m x 40mm waste pipe
- Straight coupling for 40mm waste pipe
- 135° bend for 40mm waste pipe
- Waste trap 1 1/2″ for 40mm pipe connection
- 1/2″ BSP to 12mm female barb hose fitting
- 1/2″ female 3/4″ male water tank connector
- 12mm T piece 3 way hose connector
- DN15 1/2″ water tank hose connector
- 1/2″ x 14 NPT x 1/2″ barb straight wingnut swivel adapter
- 12mm female to male lever ball valve
- 10x 40mm pipe clips
- 65mm belfast sink basket strainer & waste
- Water funnel with filter
We’d recommend purchasing these parts from a local plumbing store so that you can double check fittings before buying. Purchasing plumbing parts online usually ends up with several orders due to incorrectly advertised products!
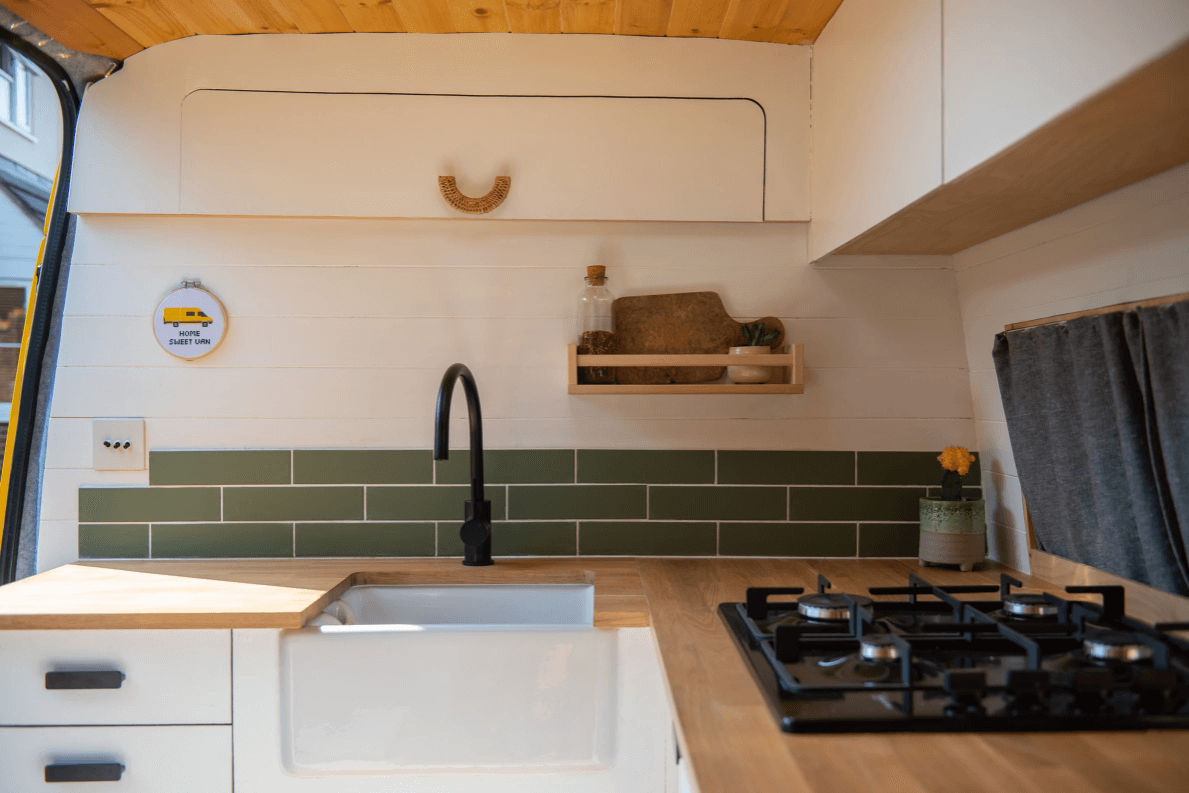
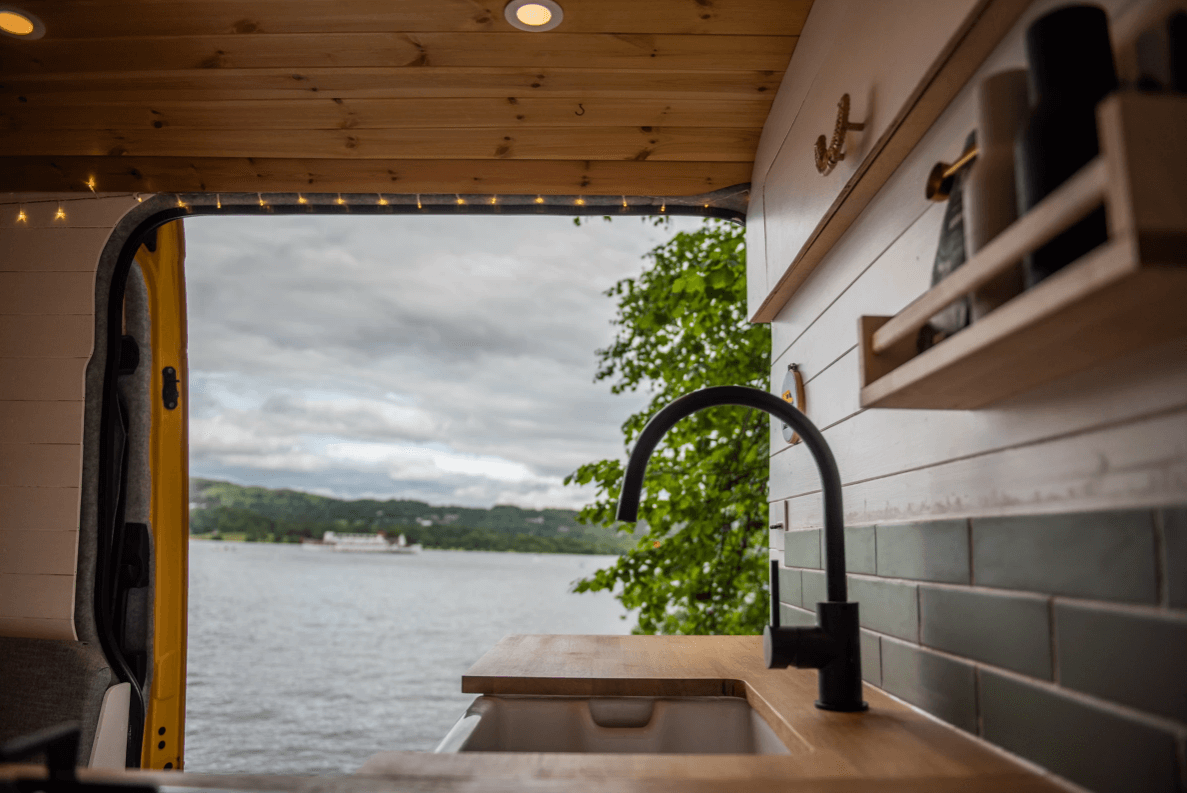
Our campervan kitchen has running water and a waste pipe that exits straight below the van
Step-by-step guide to installing a campervan water system
Mounting your water tank
Firstly, you will need to mount your water tank. The method of doing this will vary based on your tank, but ours came with some threaded bar that uses nuts and washers to attach it. We mounted our tank onto a piece of ply on the side wall by drilling some holes in it and attaching the threaded bars using a washer and a nut. At this point the ply was fixed to the wall, and then we could move the water tank into place and attach it by screwing up the other washers and nuts by the tank.
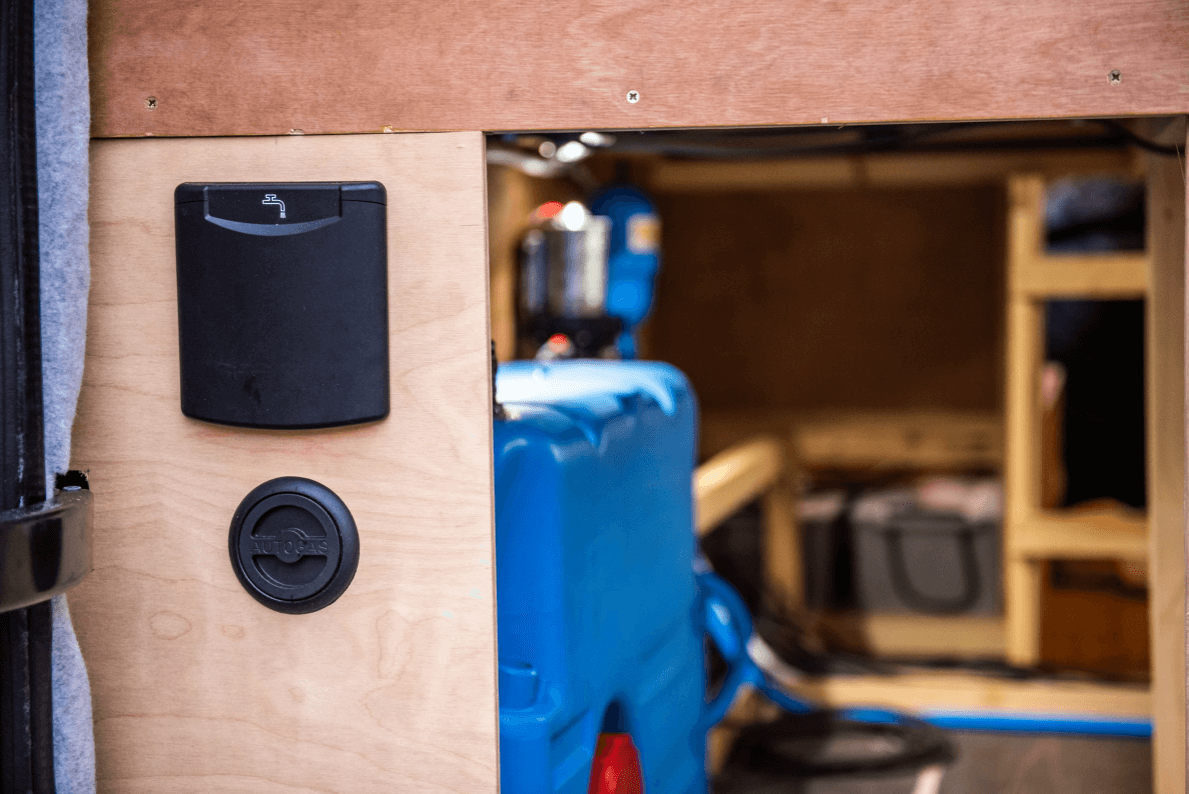
Installing a fill point
When mounting your fill point, it’s really important to mount it much higher than your tank, and ideally a bit of a distance away from it. This was another job that we would do differently next time – our fill point is right next to our tank, which means that when the tank is full and we go up a steep hill, water starts trying to splosh back out of the fill point. As long as you have a bit of a height drop and some distance, this won’t be an issue.
We chose to mount our water inlet to some ply in our boot, so we wouldn’t have to drill any more holes in the side of the van, but a lot of people do mount their fill points on the outside. Once you have attached your inlet either to some ply inside or to the outside of your van, you will need to use some convoluted hose that matches the size of your inlet and attach it using jubilee clips. We then used a water tank hose connector that matched the size of our hose to connect to the water tank.
As we mentioned before, the tank did not have many useful prebuilt inlet spots, so we had to drill our own to attach the tank connector. We then used a lot of silicone to ensure we wouldn’t have any leaks.
When you purchase your water inlet, you will need to make sure it comes with a little bung that can be removed. Once you remove this bung, it lets the water system ‘breathe’. If you do not have this, air pressure will build up in the system essentially creating a vacuum (think about what happens when you drink from a plastic water bottle and you don’t let any air back in).
Connecting the tank to the system
Once the tank and inlet were installed, we then used another tank connector to attach our water pipe to the water tank. We used 12mm food grade water pipe, which works really well for this purpose. Remember to install this at the base of your water tank so that you can access all of the water in your tank.
The water pipe is then connected to the water pump via a lever ball valve. This means that we ever have a leak in our system, we can isolate the water before it goes into the system. We attached the pipe to the lever ball valve and the pump using jubilee clips. The water pump is then connected to the accumulator in the same way. The accumulator is used to even the flow of the water, so that the water doesn’t splutter as it comes out of your tank.
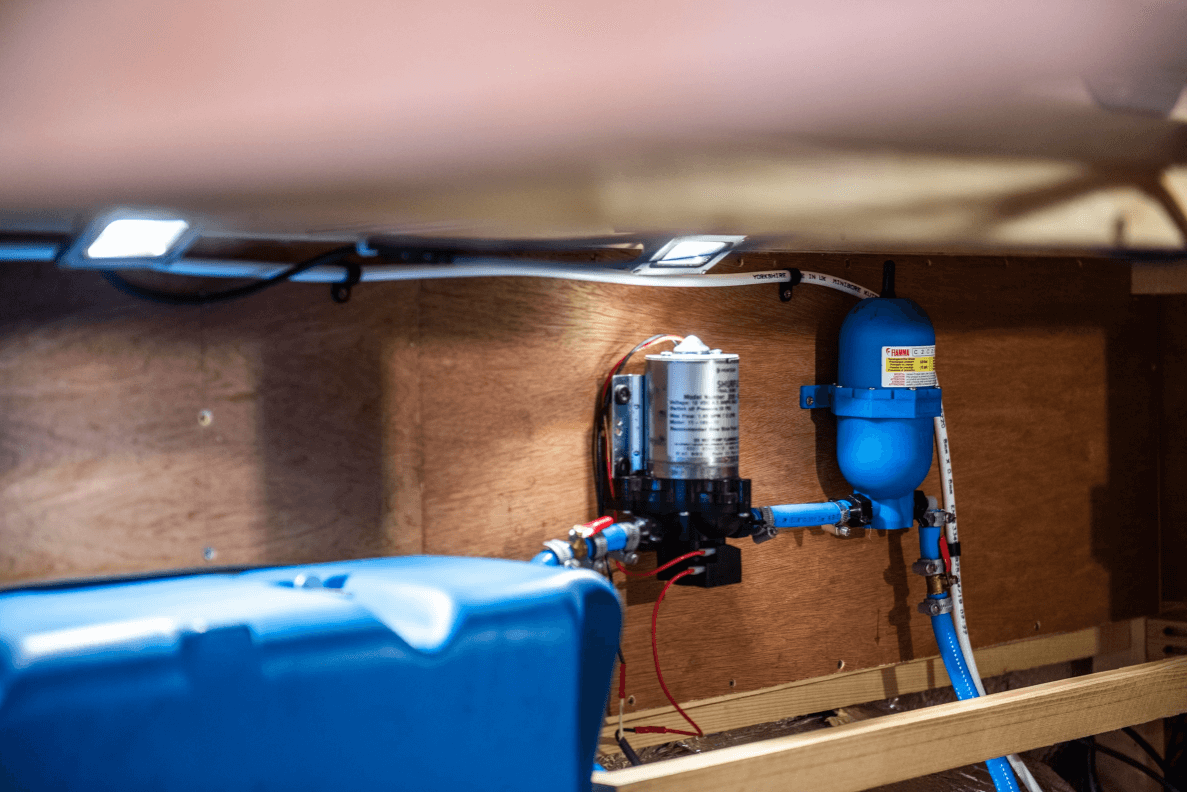


Connecting the sink and the shower to the water system
Once the water comes out of the accumulator, we used a T piece to split the pipe in 2, so that it can feed both the shower and the sink. You can use either brass or plastic for these connectors – we chose to use brass, but the plastic connectors work well too. Once again the pipe is connected to these using jubilee clips.
The pipe which leads to the shower simply needed pushing onto a female fitting which was already connected to the shower and tightening with another jubilee clip.
The pipe which leads to the sink was then split using another T piece, as the sink has 2 connections (usually used for hot and cold). As we don’t have hot water going to our tank, we just connected both sides to the cold water coming from the pump. Alternatively you could blank off one of the connections, but it would mean that one of your taps/half of your mixer wouldn’t work, so we preferred to connect both to the cold.
We used a 12mm barb to 1/2″ BSP fitting to connect the pipe to our tap. The BSP size can vary depending on your tap, so make sure you double check before you buy anything.
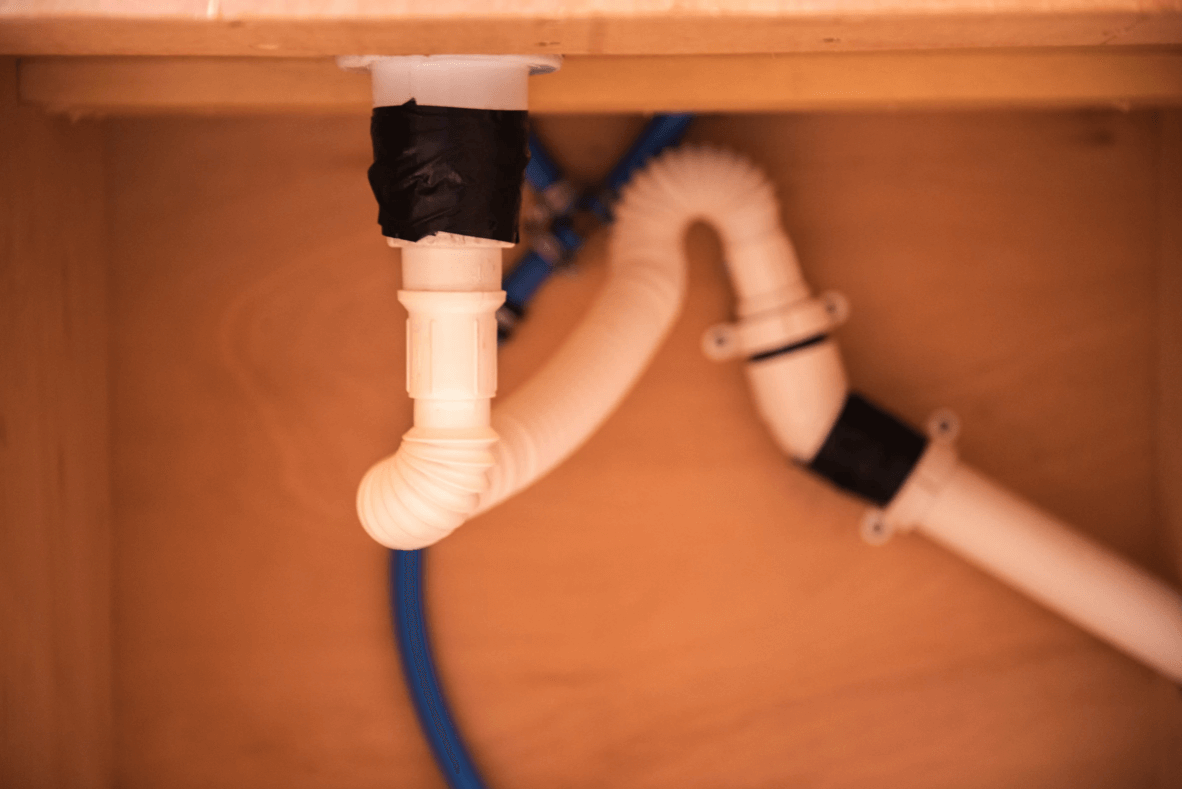
Connecting your sink waste pipe
Once all of the water is connected, you’ll just need to connect some pipe to the waste in your sink. We used a 1 1/4″ waste trap to 40mm pipe connector, but once again this size will vary depending on the waste on your sink, so make sure to check this. The waste trap is flexible so that you can create a U bend, which is important to do to stop smells (the water sitting in the U bend stops any smells from entering the van).
Because we have a large domestic sink with a large waste, it sits very low and quite far forwards. We used a waste trap with long bellows so that we could create a shallow U bend to run the rest of our pipe at the back of the cupboard and maximise space.
The waste trap is then connected to 40mm rigid pipe via a 135° bend connector, and then another piece of 40mm pipe is connected via another 135° bend connector so the pipe is going straight down. For us, this goes straight out the bottom of the van, but if you are connecting a grey water tank, this would be connected at this point via a tank connector.


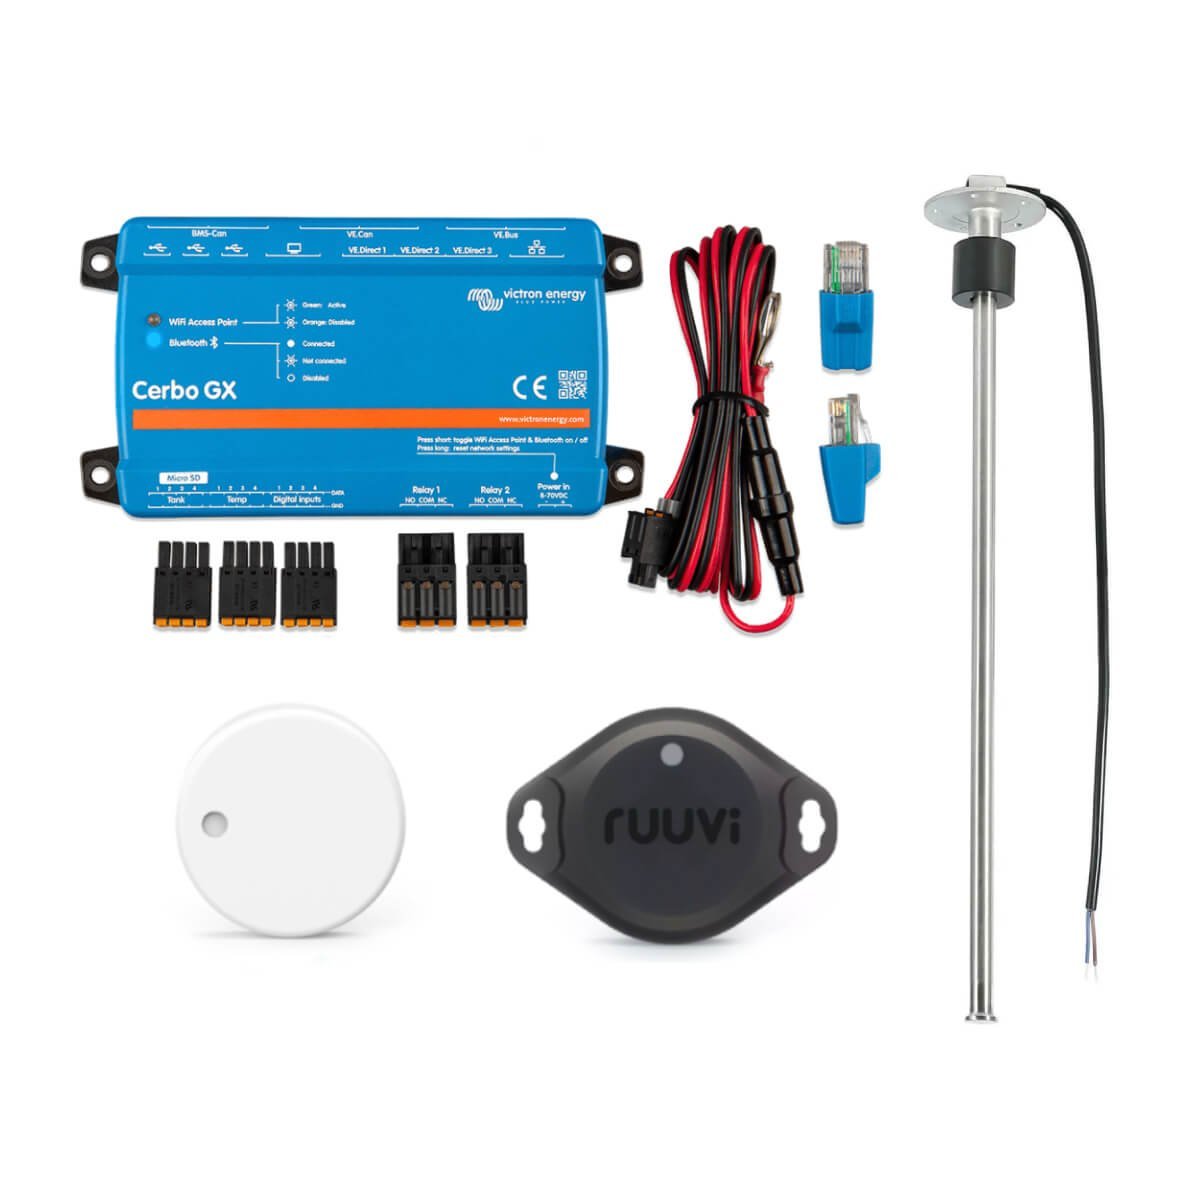
Wiring up the campervan water system electrics
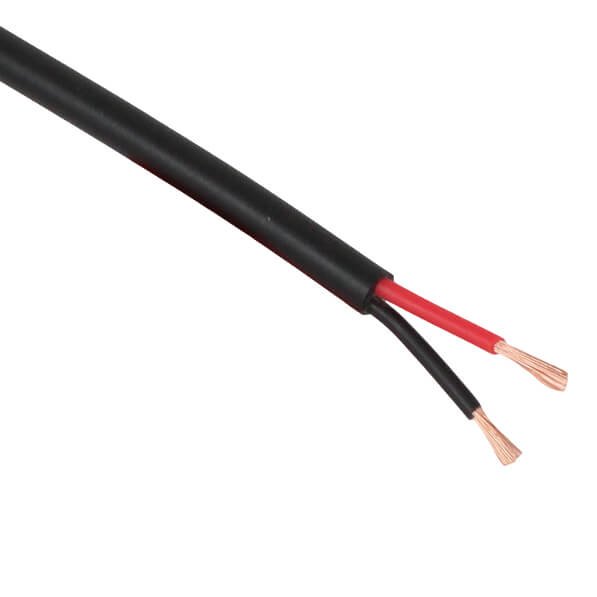
To get your campervan water system fully up and running, there are a few components you will need to connect to your electrical system (for more information on electrics, read our blog post on how to wire up your camper van electrical system). We connected our 12V water pump to our 12V fuse box via a switch so that we could easily turn it off when not in use.
Our Camplux instant hot water shower runs off LPG and only requires a spark to ignite, and this is powered by 2 D size batteries, so doesn’t need to be wired into the electrical system.


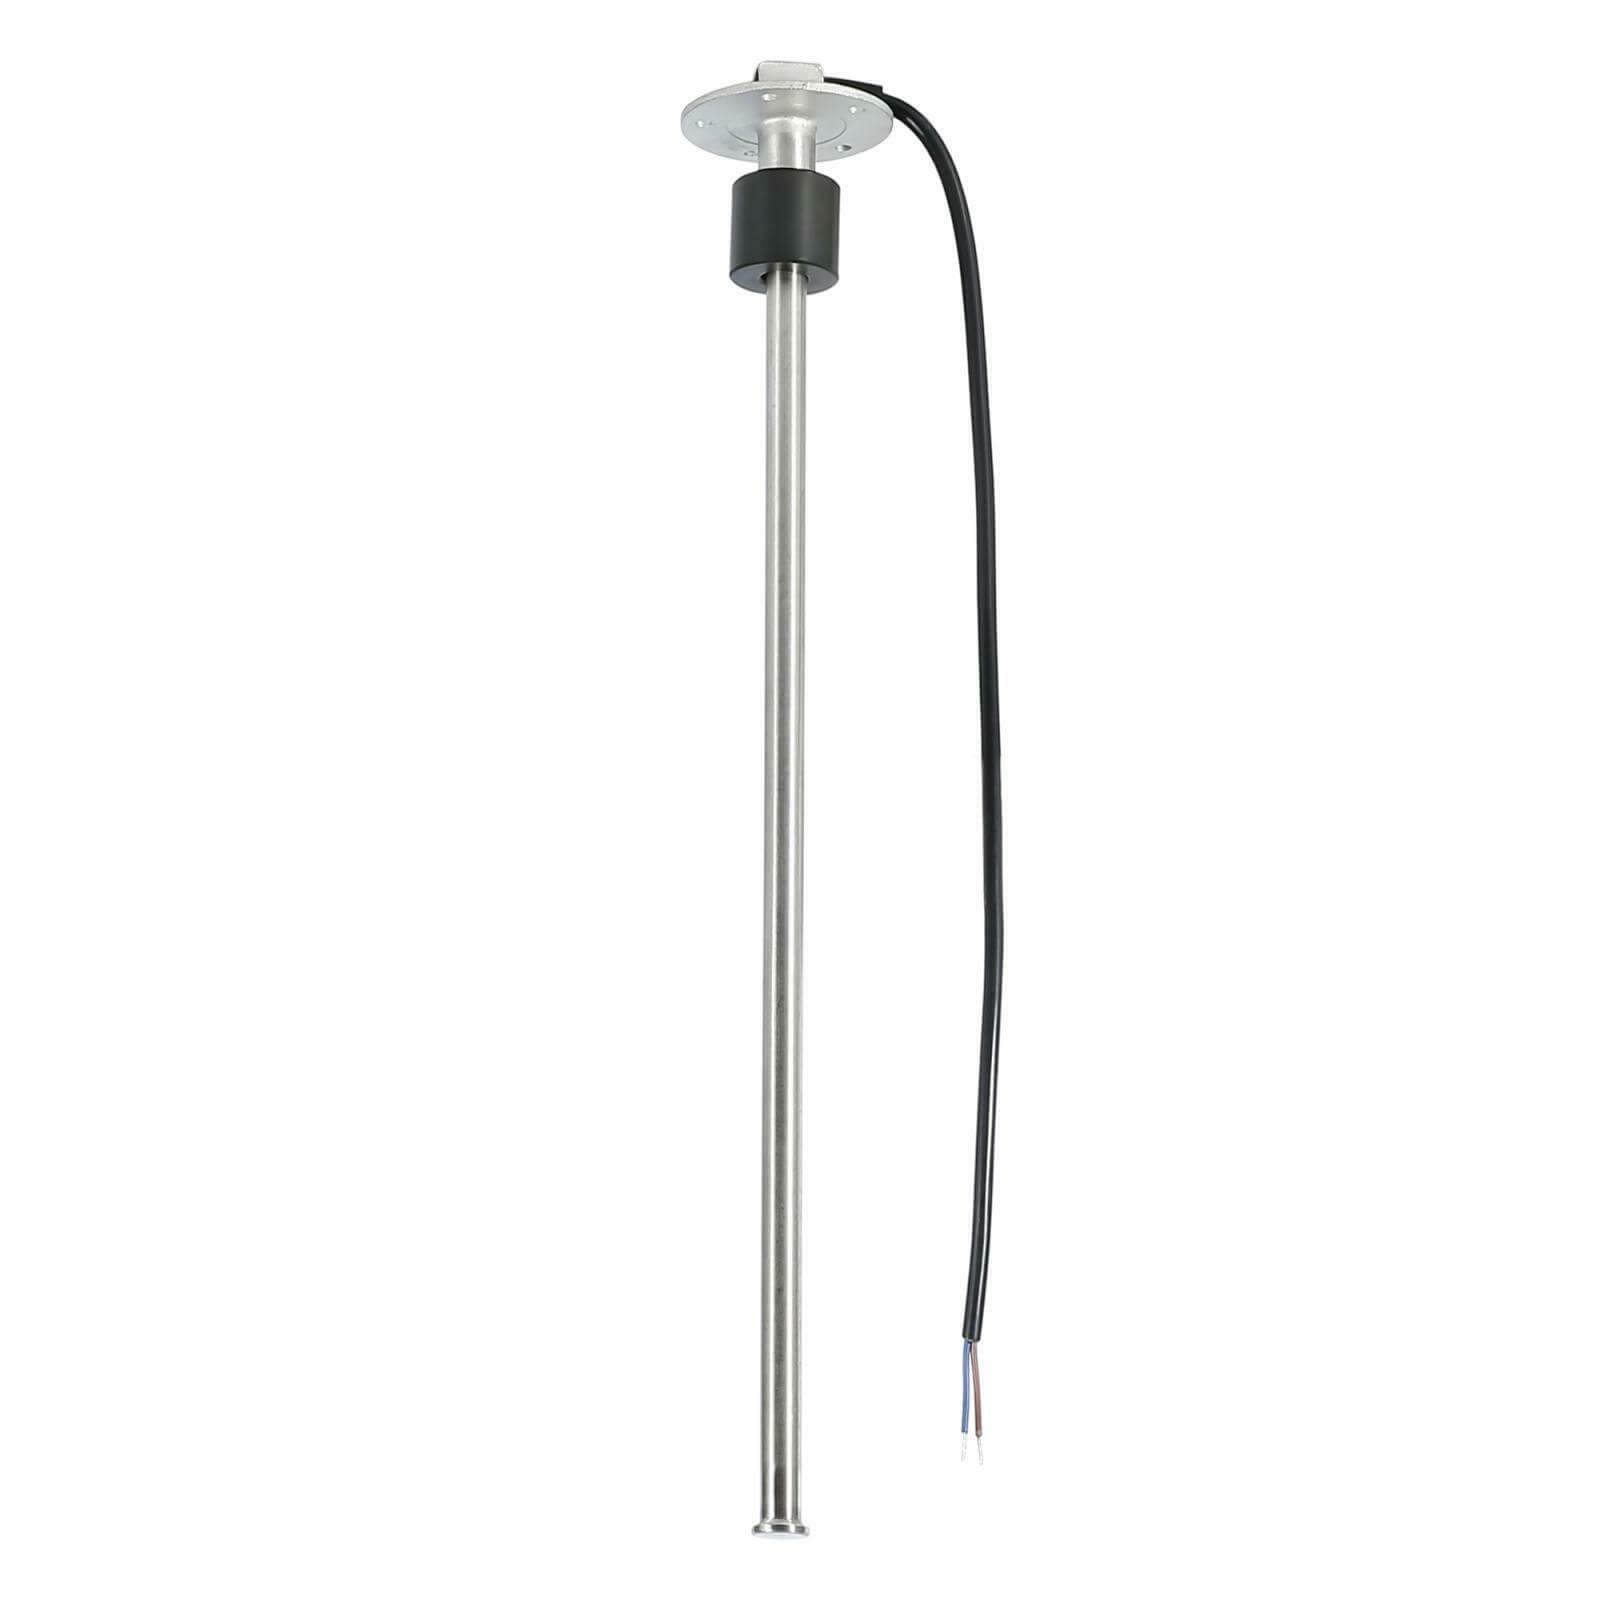
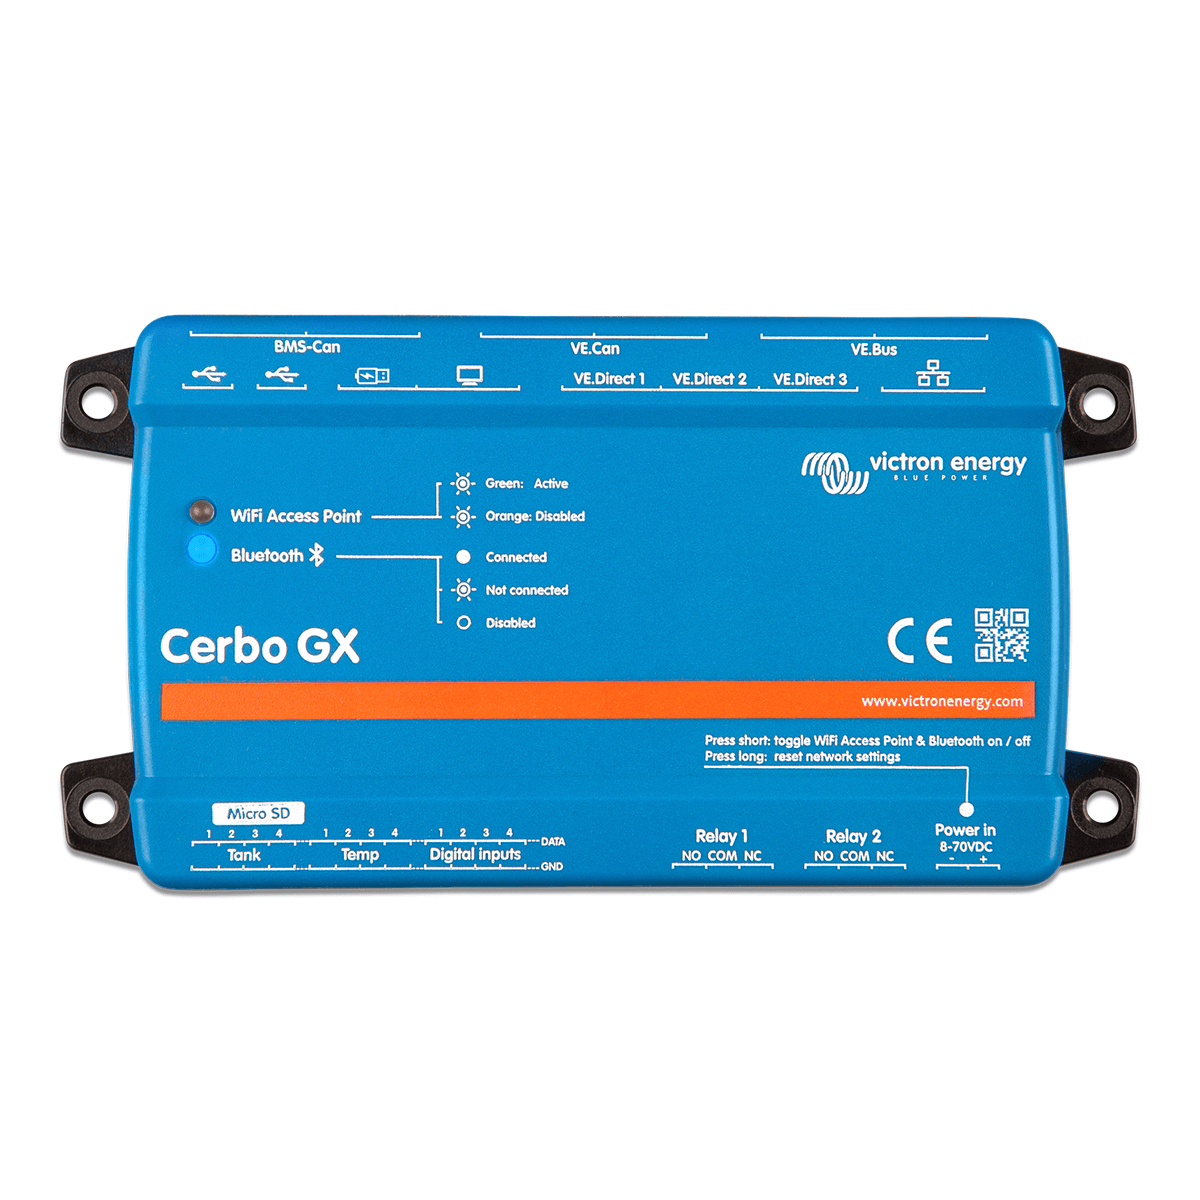
We installed a tank level sensor in our water tank. This allows us to monitor exactly how much water is in our tank. The sensor is connected to our Cerbo GX, which provides full system monitoring of our campervan. Read our Cerbo GX article to find out exactly how to connect a water tank level sensor to your monitoring system.
How to convert a campervan
Want to know exactly how to convert a campervan? Our 331 page bestselling book, The Van Conversion Bible, covers all aspect of a van conversion, from planning your layout to a step-by-step build guide.

Nice blog. Thanks for sharing.
Good blog how does the shower work? Do you just turn the pump on and turn shower on and shower works?
The system I have been looking at have micro switches and they turn on when you open tap or shower.
Thanks Simeon
Thanks! our water pump is always switched on. When the tap or shower is turned on, the pump senses the change in pressure and turns on automatically. So you don’t need to switch the water pump on/off each time you want to use water, you can just leave it on and it will turn on when required.
This is ridiculously helpful! Thank you!
How much all in all would you expect a water installation to cost? We are in the beginning stages of our conversion and just trying to budget 🙃
Hey Sophie, Glad you are finding our website useful! So we spent roughly £800 on the entire water system which includes the following: 70L water tank, pump, accumulator, hose, all connectors and fixings, a Belfast sink (~£140), a posh tap (£120) and an instant hot water heater (~£120). Hopefully that gives a rough indication of cost 🙂
Really really helpful content as always. You guys are the best.
Please could you let us know about your shower set up? Where is your shower stored and does it feed off the same gas as your hob?
Thanks in advance x
Thanks 🙂 we are hoping to share a blog post about our shower setup! The shower is a Camplux 5L tankless water heater that’s mounted next to our back doors, and is connected to our water tank and our underslung gas tank via the manifold. We also have a shower pole and curtain that attaches to the back doors for a bit of privacy, and a little wooden platform to stand on.
Hi Climbing van
Can’t wait for the Van Conversion Bible.
The site is a great resource and inspiration
I’m just starting to put a water system together very similar to your set up.
Quick question- did you pump your Fiamma accumulator up to the same PSI as the Shurflo pump PSI or leave it at the stock 13psi?
Thanks
Gav n Wendy
Hey guys, thanks for the message! We did, and we tested it before and after – we found that it didn’t really make a difference so not sure that it’s necessary. Hope that helps!
Great resource, thank you!
my question is what did you do about filtering the water to be drinkable. Especially when you start travelling and the water fill up points may not be as reliable.
Thanks
Ben
Hey Ben, it’s possible to buy filters that can be installed inline within your system that filter water to make it drinkable, but we personally haven’t installed one of these. We’ve always been able to find drinking water in various spots, but it could be worth looking for one if you think you’ll struggle to fill up!
Hi Guys! Many thanks for all this information, really helpful. I was wondering if you plan to fix the “buy now” links. I’m interested in the 65mm belfast sink basket strainer & waste but looks like the link is not working?
Cheers 😊
Bea
Hey Bea, glad you’re finding the information helpful! Thanks for flagging the broken links, I’ve fixed those now so hopefully you should be able to use them. Best wishes!
Hi guys, really useful blog thank you! Is your water tank installed under your bed? Just wondering how well the water gets pumped up to the sink as we have the same van as you and it is quite a long distance!
Hi Holly, glad you’re finding our site useful. We haven’t experienced any issues at all with the water tank being position in the boot and the sink being a few meters away. We would however recommend looking into underslung water tanks as the space-saving is pretty substantial, they just take a bit longer to fit and cost a little more. Good luck with your build!
Wonderfully helpful website and blog. Thanks for this.
Would you advise fitting a UV steriliser in the water pipe? We’ve had instances of bits of algae etc coming out the tap after a period of non-use. We always boil the water for drinking.
Hey Malcolm, definitely would recommend a UV steriliser, we recently installed one in our own system after having similar issues due to water from questionable sources and having to fully flush our tank through! We have the Acuva UV purifier plus the carbon pre-filter for removing particulates etc. Hope that helps!
Hi guys,
At what stage did you install your UV filter — between tank & pump, or under-sink i.e. just before tap?
Cheers,
Tom
Hi Tom, we installed it under the sink, so between the pump and the tap. Hope that helps!
Hiya, thanks so much for all your information. I have been following your water system and have bought all the parts. I am struggling to connect the waste pipe with the u bend to my rigid pipe. they just seem to sit together rather than push in to show any connection. is tape necessary (if so, which one?) and perhaps the measurments arent correct for myself. I ordered waste trap to 40mm then a 135 bend connector to 40mm and a 40mm pipe. please could you help 🙂
Found this super useful. The point about not needing a waste water tank too as you’re wild camping was especially useful. Thanks
Glad you found the post useful, thanks Charlie!
Once again, love all of your info! Quick question. Do you wire a 12v tap to the pump which is in turn wired to the fuse board or does the tap need a separate run to the board?
Hi Rob, I must admit I haven’t had any experience with 12V taps however it makes sense for it to be run separately so the pump can run whenever it needs to. Hope this helps.
Hi both,
Thanks for the really useful info! I was wondering if it would be possible to get hot water to a tap as well as the shower from the tankless water heater?
Thanks
Hey Dom,
In theory it is possible yes, but you would need a tankless water heater with a permanent flue so any exhaust gases can escape if you wanted hot water when the doors are closed, then you don’t need to keep the water heater outside for ventilation.
Thanks for the quick response! I feel like just boiling the kettle if hot water is needed in the sink is easier then cutting another hole in the side of the van.
Thanks
We concluded the same 🙂
Hi. How did you run the water supply from the boot area to the sink? I was thinking running an additional pipe as you did with the battery to battery charger to run it through as we are currently at the floor batten design stage. Or did you do it an easier way? Many thanks
Hi Gregg, we just ran out water pipes along the front of the boot and under the kitchen units, we didn’t need to run ours under the floor. Best to have them accessbile in case of any leaks. Thanks
Hiya both I wonder if you have any info on venting the boiler with the back doors shut .if I need a flue and any advice on where I could get one . Thanks for all the info keep up the good work. Rob
Hi Rob, you would need to buy a specific boiler that has a flue attachment to do it in a safe way. I believe there are similar style boilers to what we have but with flue attachments so you can install it indoors and vent out any gases. Good luck with it! Thanks, Charlie & Dale
Hello,
I noticed you used a second Lever ball valve between your accumulator and T piece in the image but couldn’t see this written in step through or shown on your diagram. Would you recommend doing this?